|
Getting your Trinity Audio player ready...
|
This is the third part in a series I’m calling “How-To”. The first part was about entering insurance bills and the second part was about how to enter a VicRoads registration bill. I will be using Xero to present the example, but don’t worry if you use another software, the basic rules will still apply.
The third how-to is about how to enter a Chattel Mortgage asset and associated loan into your accounting software.
Step 1
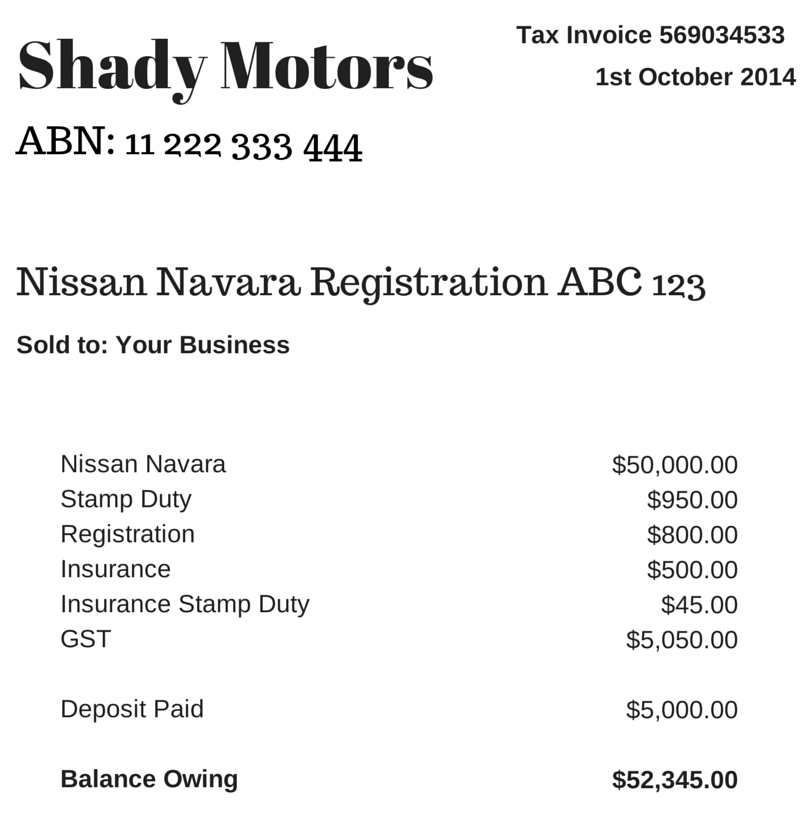
Let’s say your business has purchased a new motor vehicle. The invoice from the vehicle dealer might look something like the below example. Grab your invoice now.
Step 2
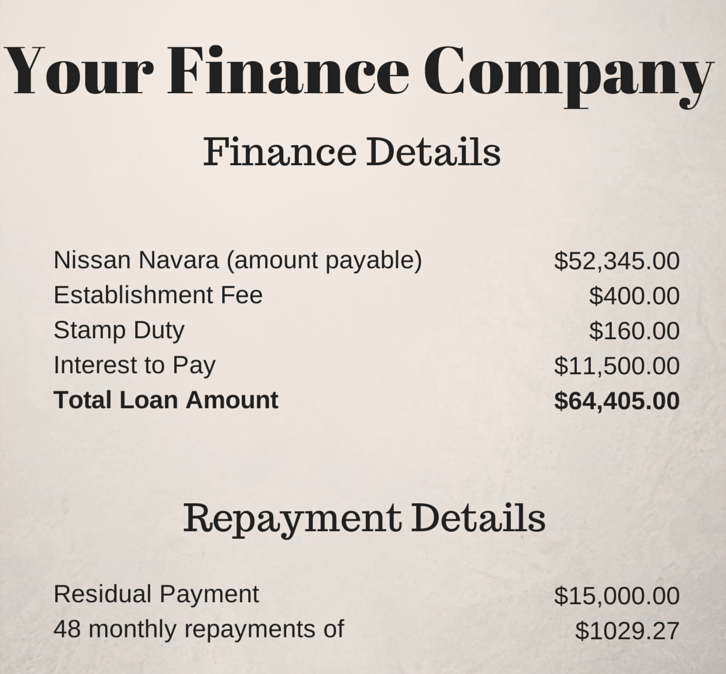
The finance company loan schedule is also required. It may look something like the below example. Grab you loan schedule now.
Step 3
Create the following accounts in your software (check first because some may already exist):
- Deposit Paid (Current Asset) – no tax code
- Motor Vehicles at Cost (Non-Current Asset) – apply capital expense including GST tax code
- Chattel Mortgage (Motor Vehicle) (Non-Current Liability) – no tax code
- Chattel Mortgage Interest Charges (Expense) – no tax code
- Chattel Mortgage Fees & Charges – tax code varies, could be Free or GST inclusive (check your documentation)
- Motor Vehicle Registration (Expense) – apply GST Free tax code
- Motor Vehicle Insurance (Expense) – apply GST inclusive tax code
- Unexpired Term Interest (Non-Current Liability) – no tax code
Step 4
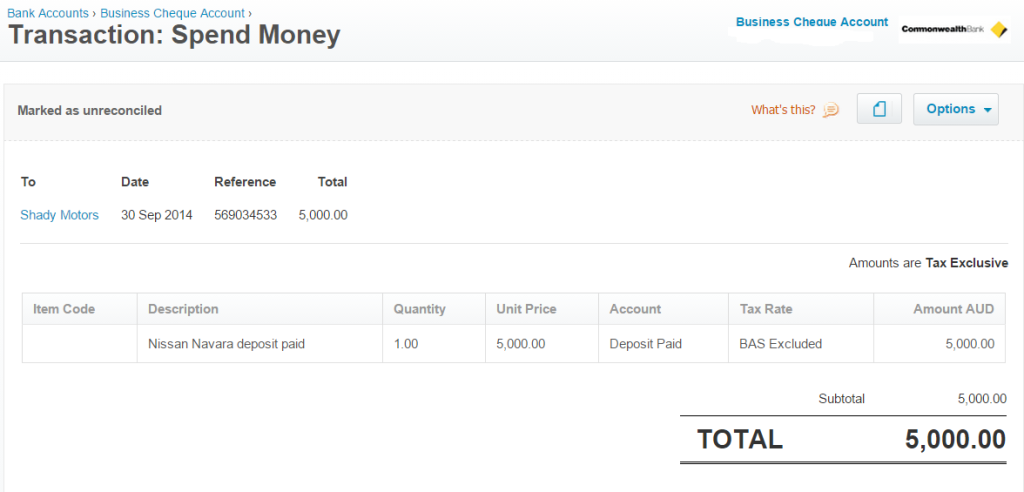
First enter a spend money transaction to record the payment of the deposit:
Step 5
Next, enter this journal to record the purchase of the new vehicle:
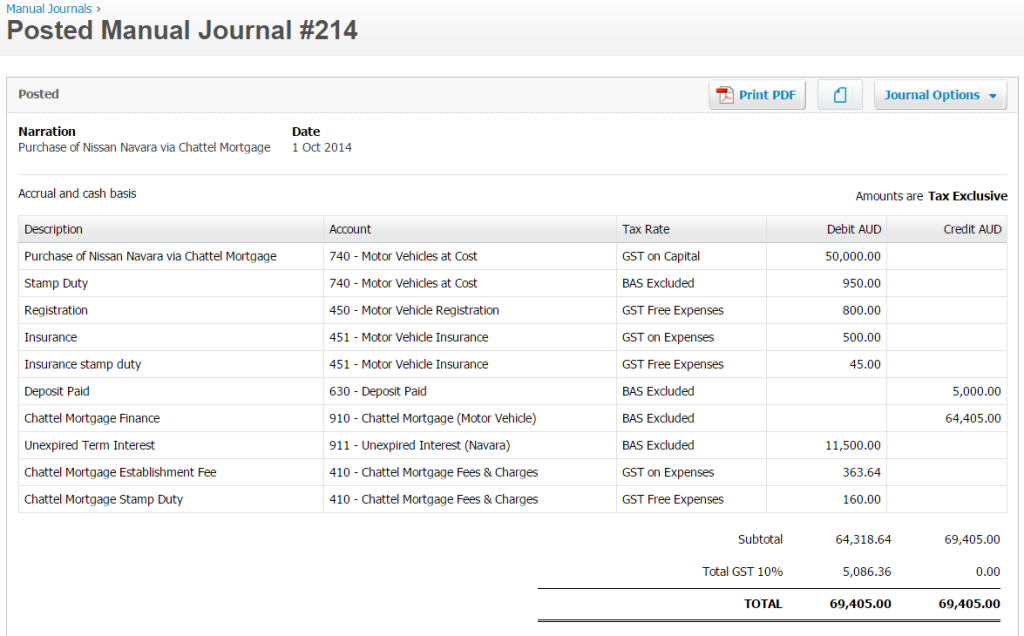
Step 6
When it comes time to make a repayment to the finance company, enter a spend money transaction like this:
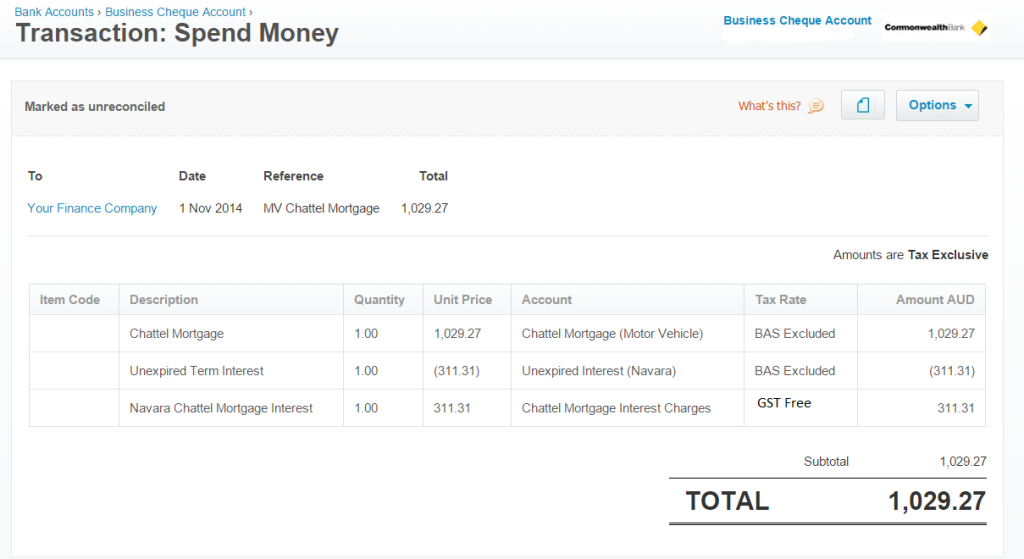
Bonus Tip!
Sometimes it isn’t possible to obtain the loan repayment schedule for whatever reason. When this happens, you need to create your own. I use this amortisation calculator by Bret Whissel. It has served me well over the years. I hope you find it useful too.
Next week for part four of this How-To series, I will cover how to set up a Hire Purchase agreement in your accounts. Until then, happy bookkeeping!
Hi Louise
Thank you for this in depth explanation. I have one question in regards to trading in a motor vehicle in the above scenario along with a deposit.
Where do we code the trade in price to as I created a credit against (740 – Motor Vehicle at cost) but now it is giving me a lower vehicle price in my balance sheet.
Regards Stephen
Hi Stephen, when a vehicle is traded in, you need to include depreciation and gain or lose on sale of the vehicle. As this can be quite complex, you would be best to ask your accountant or tax agent to assist you with the journal.