One of the most useful online apps I include in my “bookkeeper’s toolbox” is Dropbox. Dropbox allows users to upload and share files with others regardless of location. This is a wonderful tool considering most of my clients are interstate. What I find however, is that some clients use it successfully with me and others, well, not so much! Those who use it successfully follow a specific procedure and today I am going to share that procedure with you so that you too can use Dropbox with your bookkeeper more effectively.
 So what is the most effective way to use Dropbox with your bookkeeper? Basically, you need to get organised! There is some homework to do first so let’s take a look at what needs to be done:
1. Create folders in Dropbox
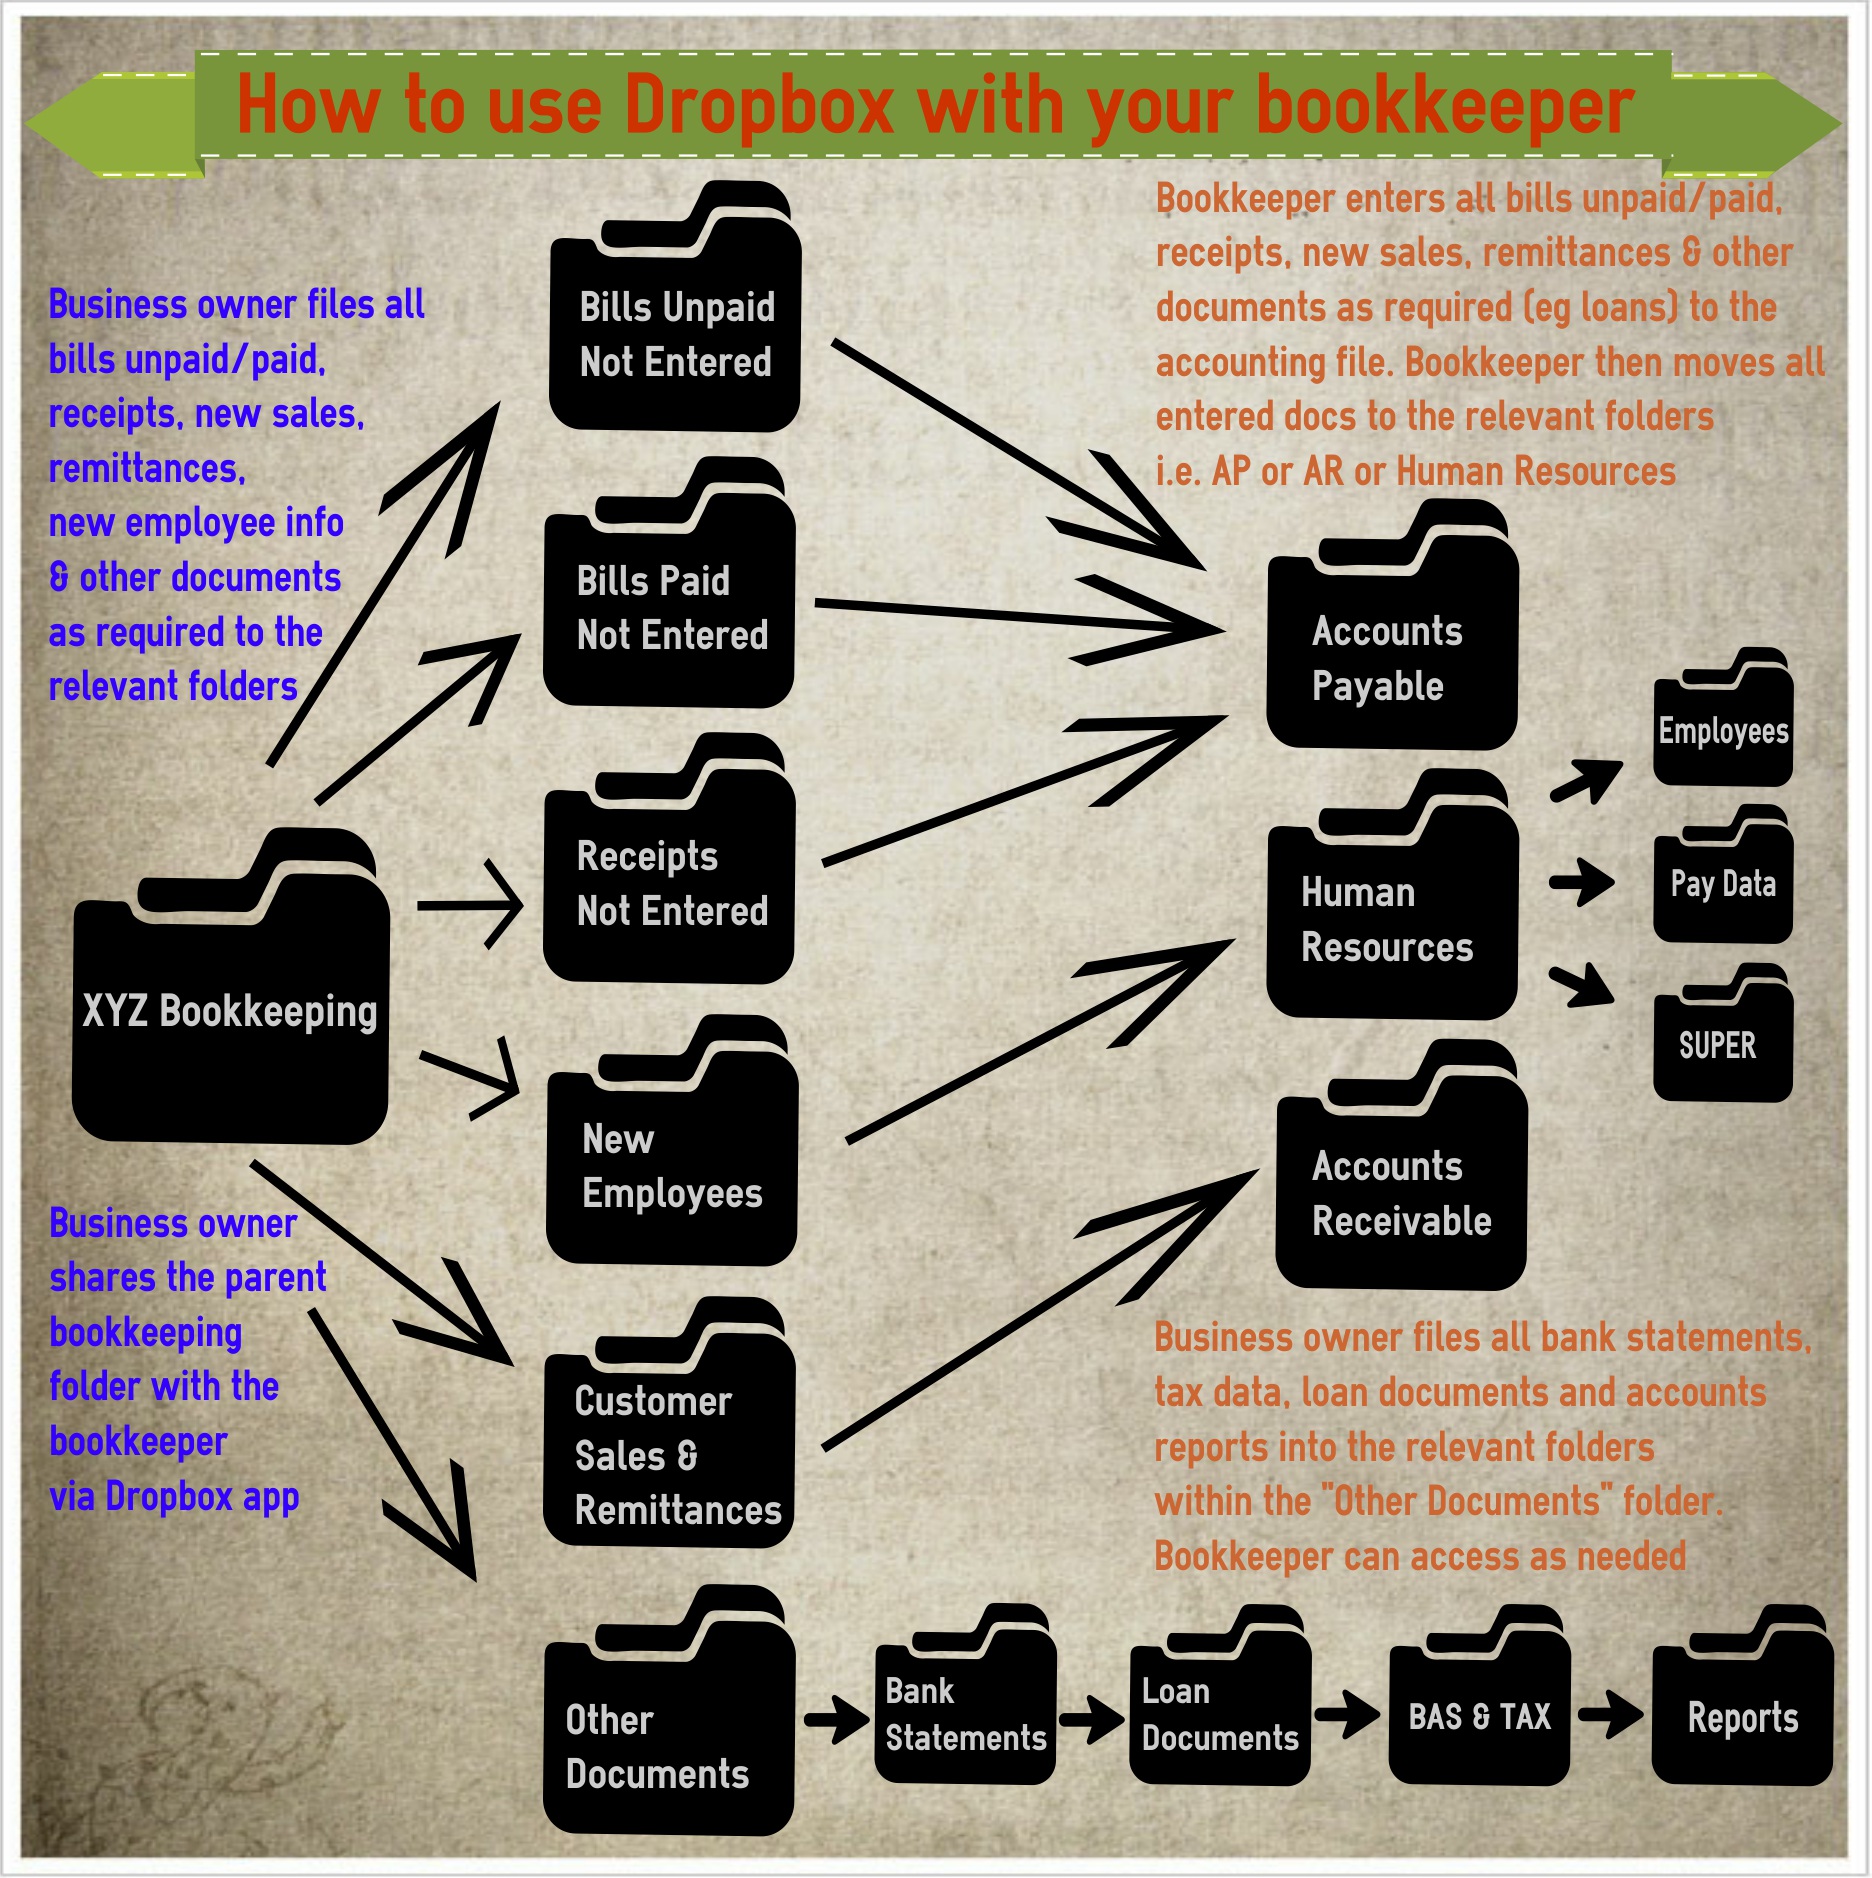
- Create a parent bookkeeping folder. Name it “Your Business Name Bookkeeping”
- Create sub-folders within the parent folder as follows:
Bills Unpaid Not Entered, Bills Paid Not Entered, Receipts Not Entered, New Employees, Customer Sales & Remittances, Other Documents, Accounts Payable, Accounts Receivable and Human Resources. - Within the “Other Documents” folder, create the following sub-folders: Bank Statements, Loan Documents, BAS & Tax and Reports.
- Within the “Human Resources” folder create the following sub-folders: Employees, Pay Data and Superannuation
2. Gather your documents
Once you’ve created the folder tree, you need to collect your documents. You will need the following
- Bank statements
- Bills, paid and unpaid
- Loose receipts
- Payroll data
- Any loan documentation
- Customer remittances & other sales information
- Any relevant tax documents
- Any other data you feel is relevant
Now you need to get these documents into the folders you’ve just created. If the documents are in electronic format it will just be a simple matter moving them with a click of the mouse. If, however, they are hard copies, you will need to first scan them into your computer into the appropriate file format. This can be very time consuming so might be a great job to give to your teenager who’s after some spare pocket money!
3. Share the bookkeeping file with your bookkeeper
Now that you’ve created the folder tree for your business bookkeeping, it’s time to share it with your bookkeeper so she/he can access it. Here are the instructions from Dropbox on how to do that.
So with the preparation work out of the way, now you can get down to actually using Dropbox with your bookkeeper!
The procedure
Once per week (or other agreed interval):
- Client adds all new data to the relevant folders including bank statements, bills, receipts, customer data, payroll data and any other documents as needed
- Bookkeeper checks Dropbox for new documents and enters data into the accounting file as required
- Bookkeeper moves all newly entered documents to the relevant folder for filing purposes i.e accounts payable or receivable and/or human resources.
- Documents within the “Other Documents” folder are not moved. Those folders are digital filing cabinets and act as such for any data they contain.
- Review: connect with your bookkeeper each quarter and discuss any issues that may arise with using this procedure and make amendments if necessary
**TIP! How you organise your data within each folder is up to you but I suggest that sorting via month and year is a good way to start. Also, name files with YYYYMonthDay format at the beginning of the file name – makes it easy to search for data later 😉
For those who are more visually orientated, here is an info-graphic that explains the above procedure:

Hopefully this blog has provided you with some ideas about how to use Dropbox with your bookkeeper more effectively.
Do you currently use Dropbox with your bookkeeper? Do you use it in a similar way to me or do you have a different procedure? Feel free to add your ideas and tips for using Dropbox with team members below – I’d love to hear them 🙂
